

We have recently integrated with a new list building app called LetSpinio.
Please watch the tutorial below.
Step 1: Log in to your LetSpinio account.
Step 2: Click Campaigns and Wheel campaigns.
Step 3: Enter Campaign Name, Choose Wheel and click next.
Step 4: Configure the slices on your wheel and click next.
Step 5: You can edit the Title and Guiding Text or leave them as default and click next.
Step 6: Now you are in Advanced Settings, configure where to show up the campaign and other conversion-specific settings. (All fields marked with a * are required.)
Step 7: Add a domain and tell it which page do you want the actual wheel campaign to load.
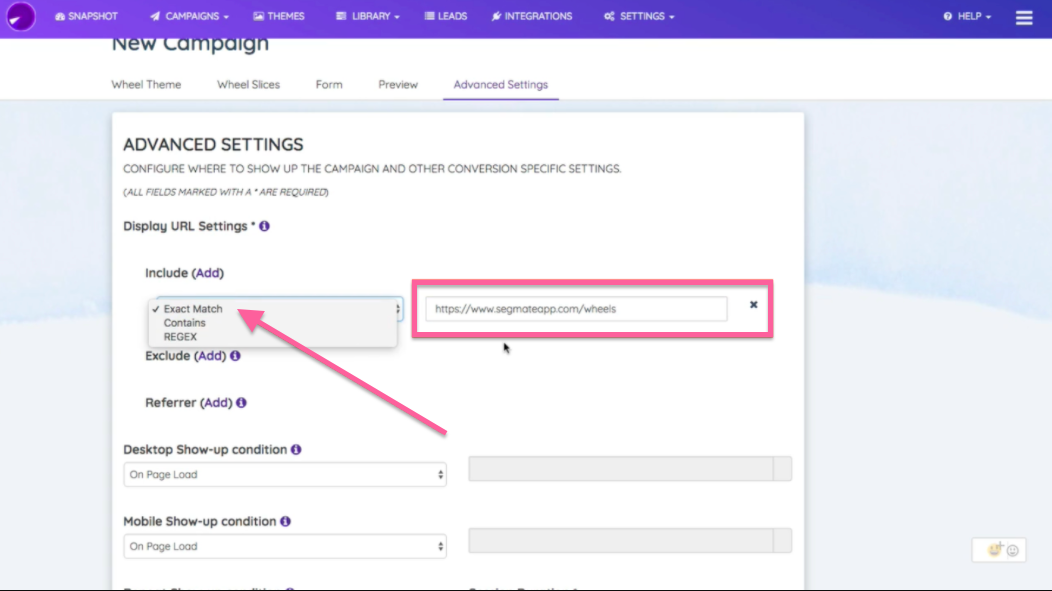
Note: Please watch Letspinio tutorial to know more about these settings.
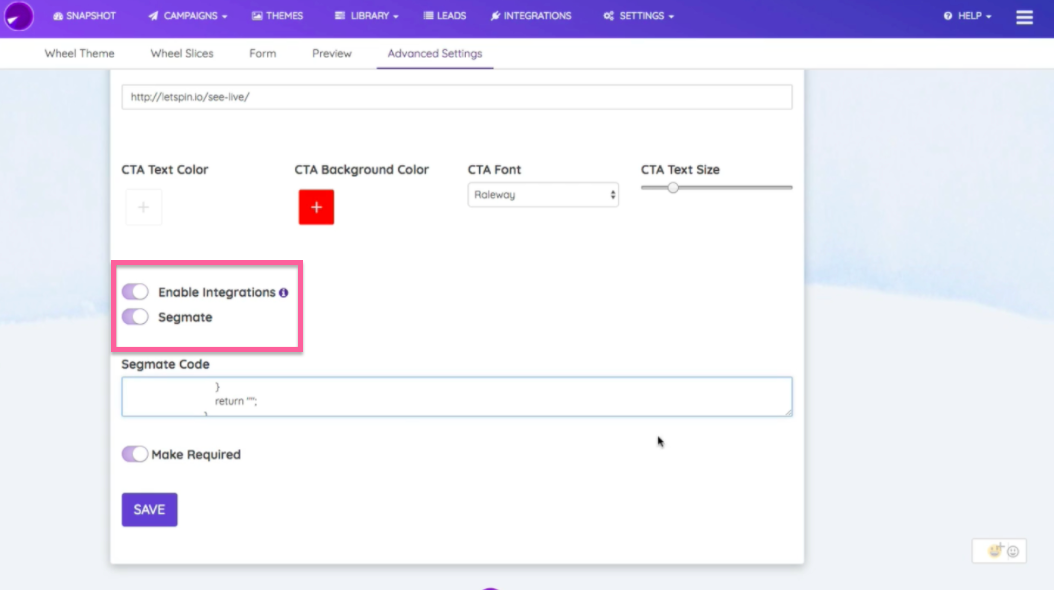
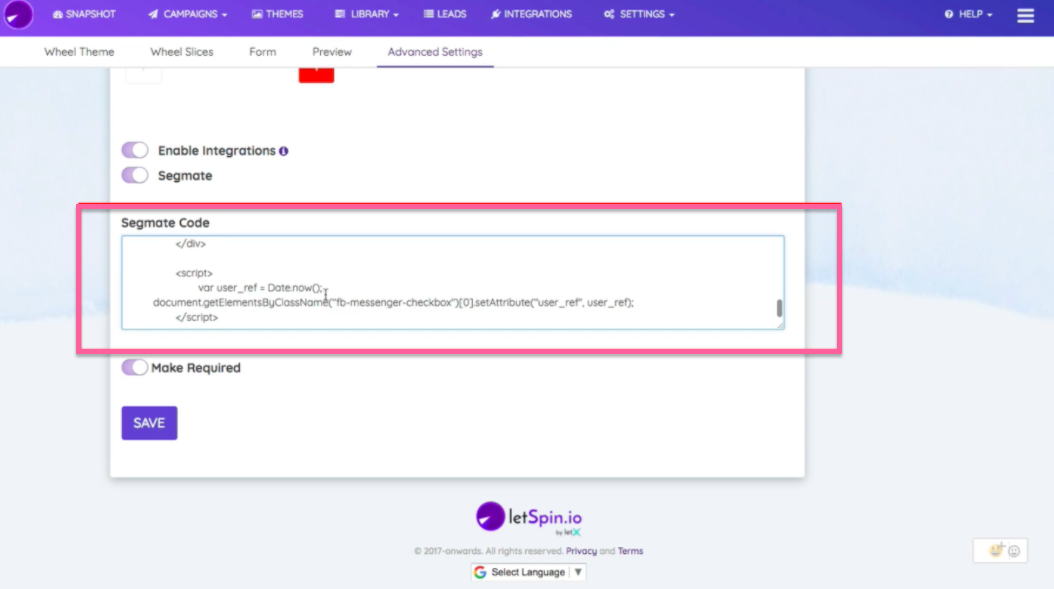
Step 8: Please make sure that you turn on the toggle for both Enable Integrations and SegMate. You can get your SegMate code by clicking the Settings > Pixel. (Please make sure to open it in a new window so you won't lose what you have done)
Step 9: Copy the Pixel.
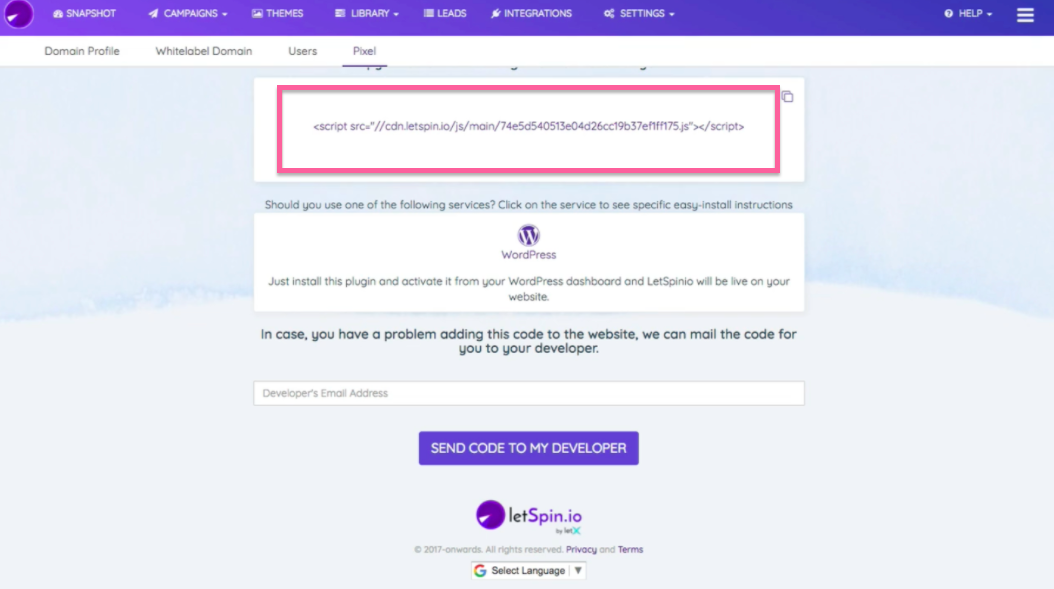
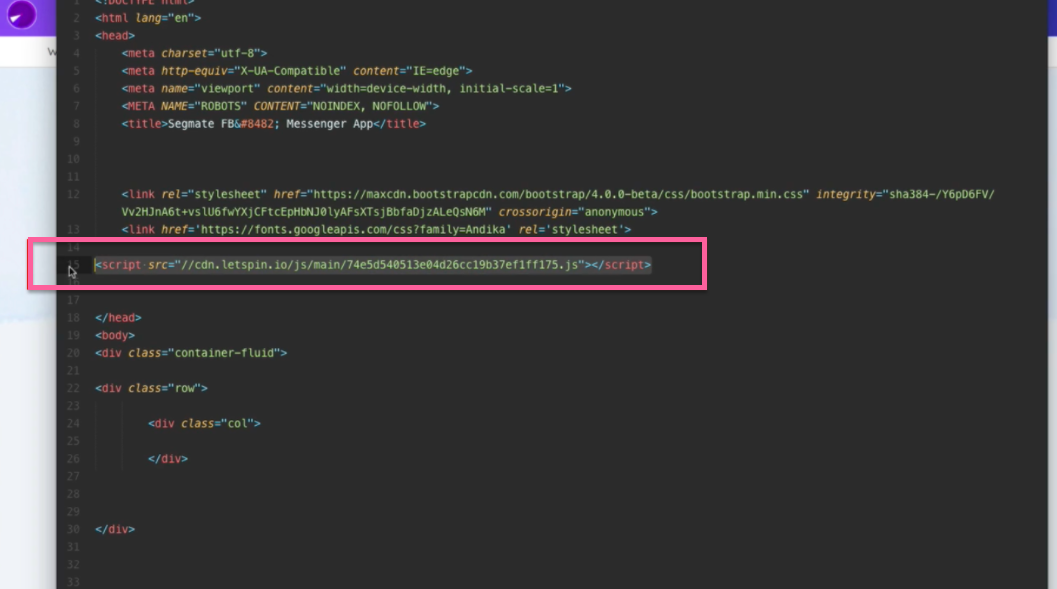
Step 10: Don't forget to put it to your HTML page between your head text.
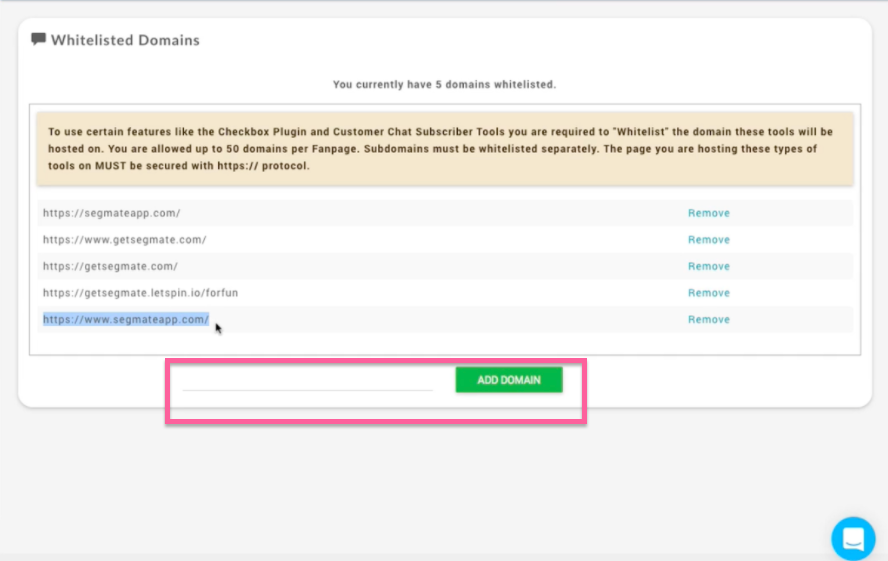
Step 11: To make sure that the integration works well with the checkbox, please go back to SegMate > Settings > Whitelisting Domains and add your whitelist domain.
Step 12: Go to Subscriber Tools > click Checkbox and create checkbox.
Step 13: Create a Name and enter the website domain. Then select a plugin size and allow login.
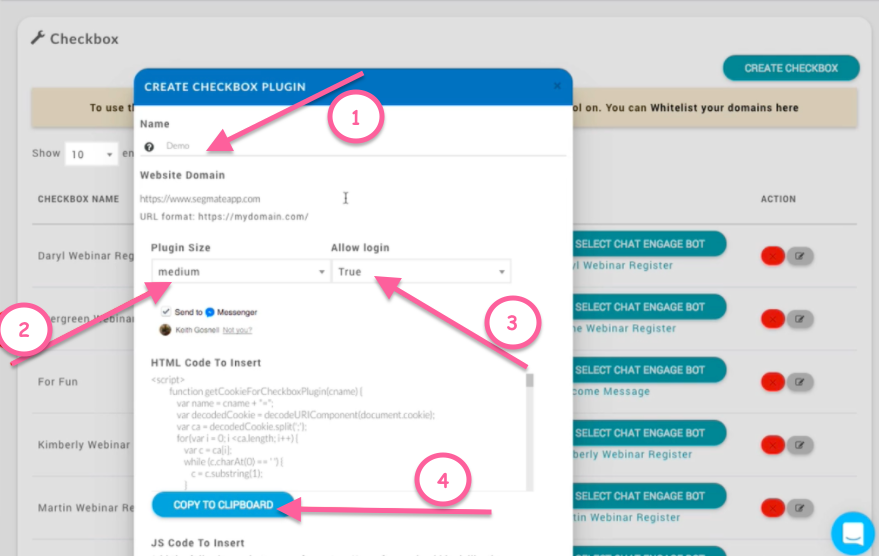
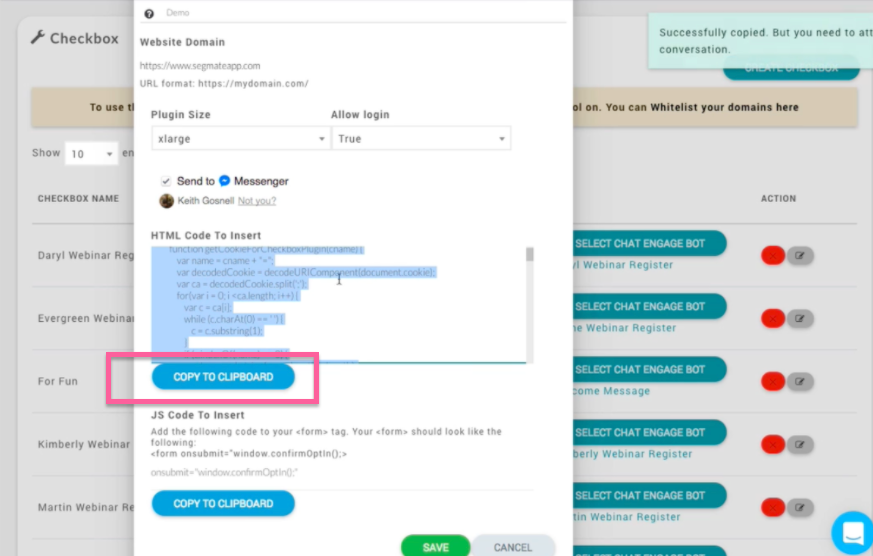
Step 14: Click the Copy to clipboard and hit Save.
Step 15: It will take you to the Checkbox page, and you will see your demo there and click Select Chat Engage Bot. Then select the bot that you already created.
Step 16: Go back to Letspinio and paste your HTML code to your SegMate code. Then click the save button.
Note: When anybody submits on a Letspinio page, the bot will fire into that person's messenger.
If you are interested in learning more about LetSpinio, you check to visit their sales page by clicking here.