integromat is a newer app aimed to pretty much do the same things as Zapier but at a much more competitive price. Many users have asked how they could use integromat and really anything that has a catch webhook can do this. In this video, Karl demonstrates how to use integromat for catching emails from messenger and pushing the email data to ActiveCampain. There 100's of use cases and other apps you'll be able to do this with.
If you do not have an integromat account here is a link to get started today: https://clik.site/integromat/
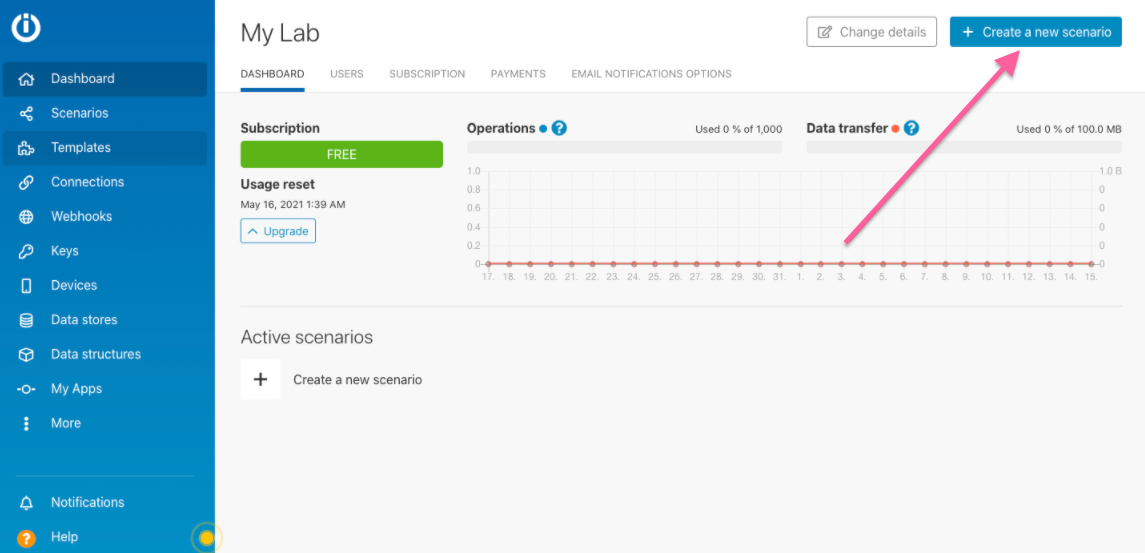
Step 1: Log in to your Integromat account and click Create a new scenario.
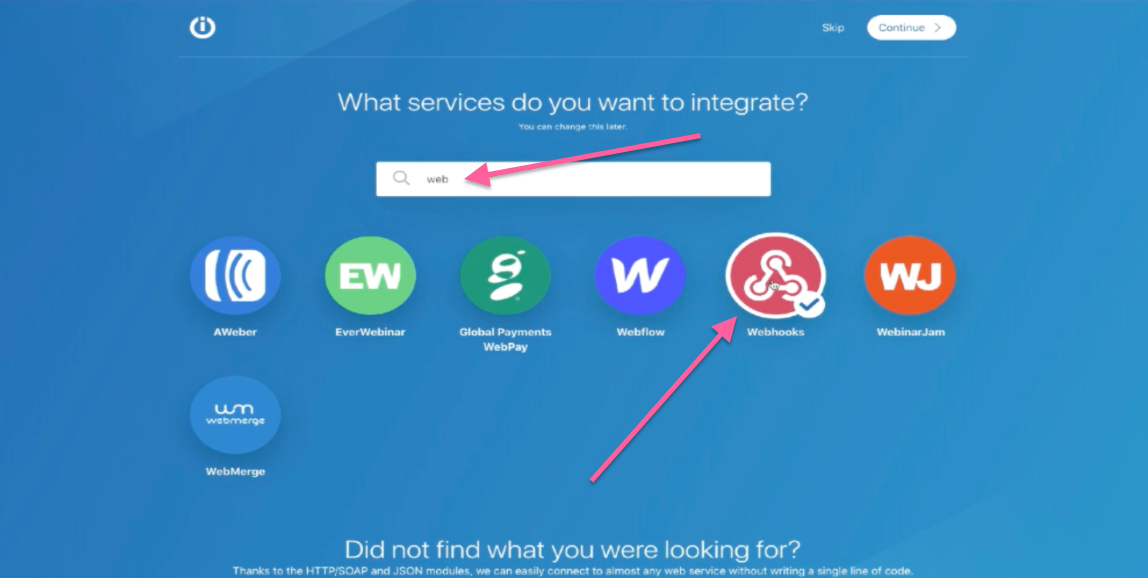
Step 2: Search and click Webhooks, then click continue.
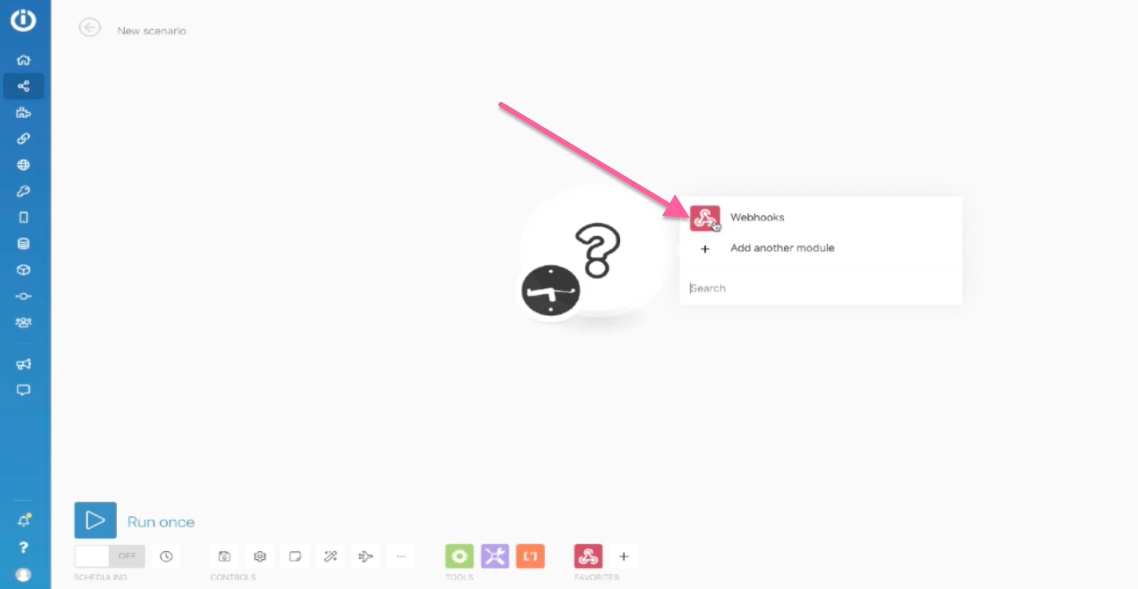
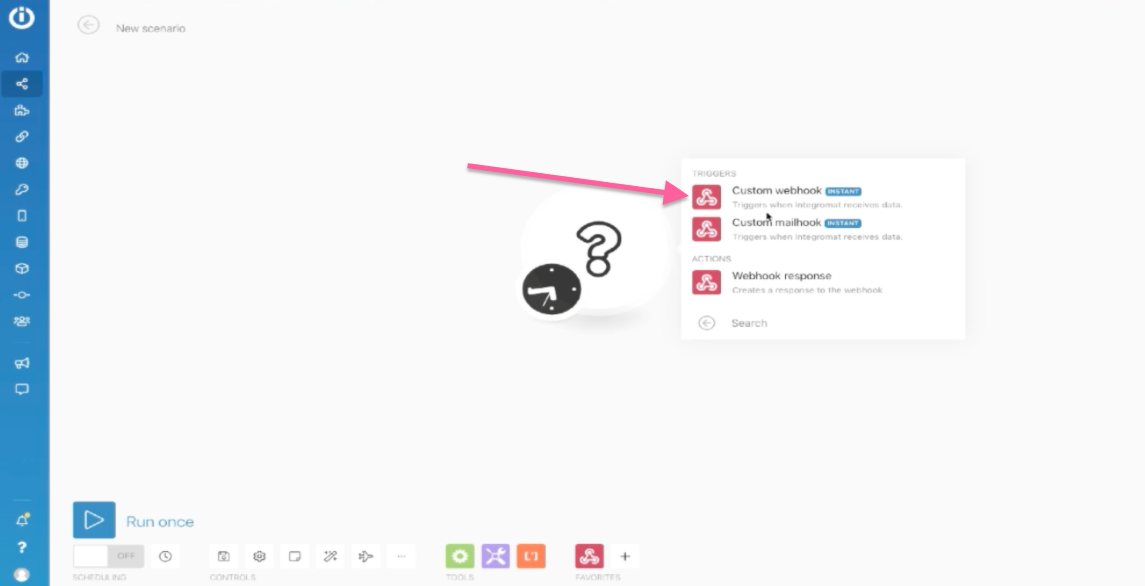
Step 3: Click Webhooks and choose the Custom Webhook.
Step 4: Click Add and Enter a Webhook name then click Save.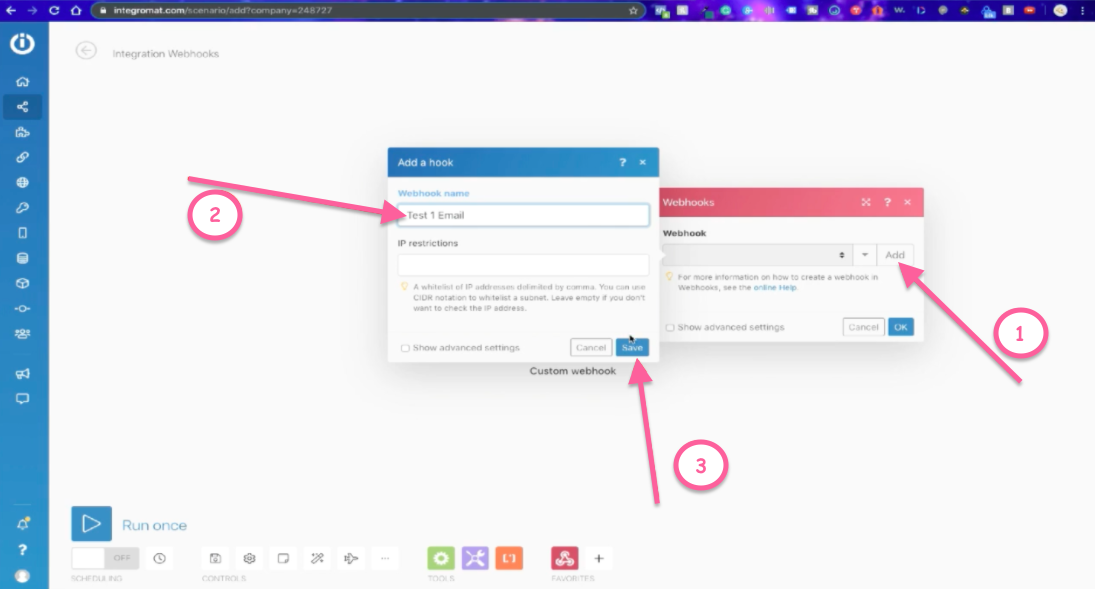
Step 5: Copy the URL and go back to SegMate.
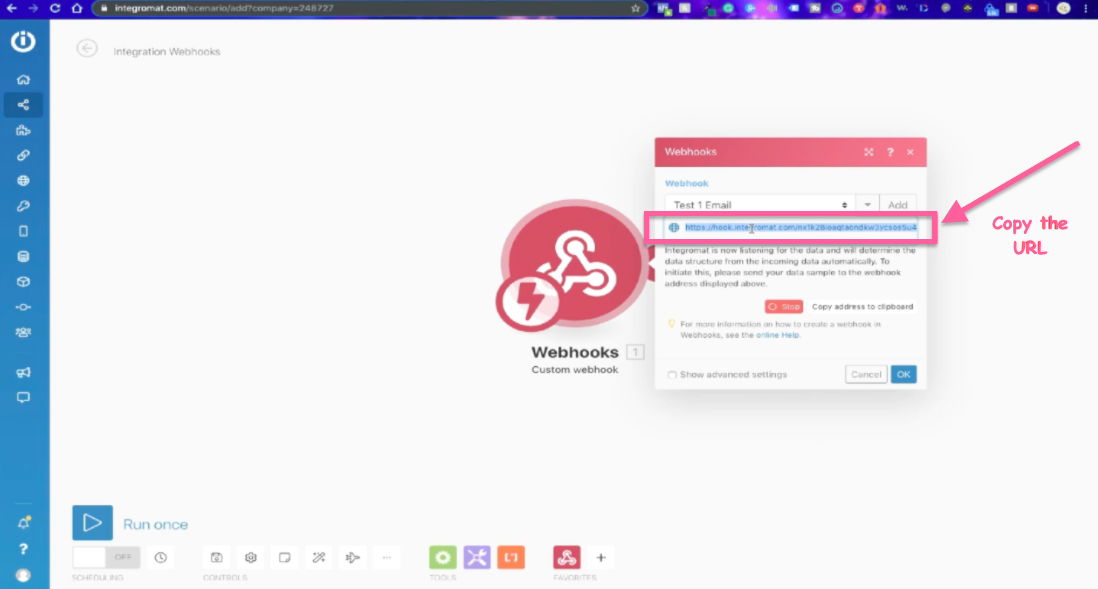
Step 6: Create your bot and make sure to use the user input. Go to Chat Engage > Create a bot > Delete the Text Field > Click the User Input Button. 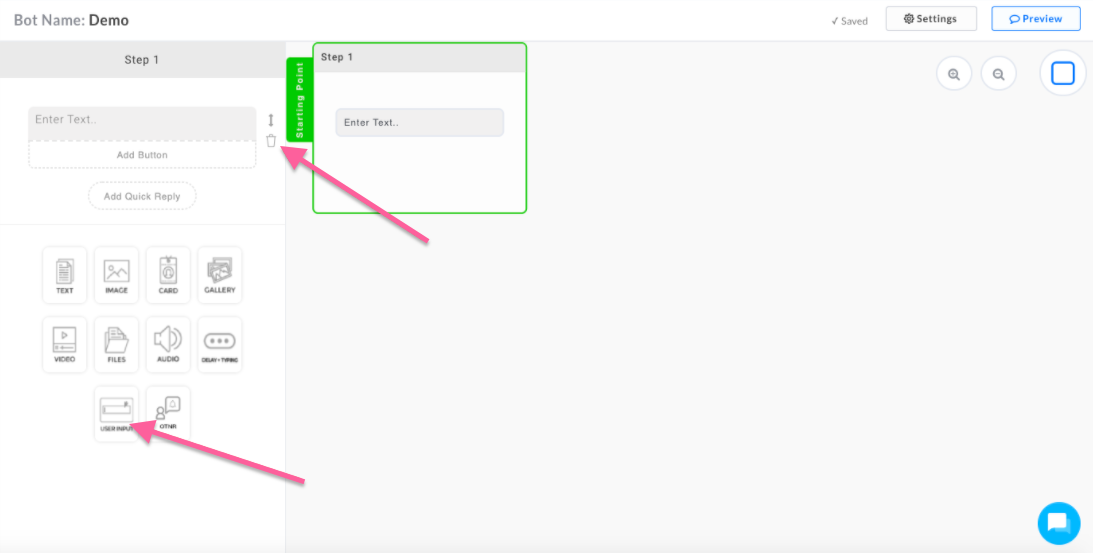
Step 7: Enter your question on the text box and choose your User Input. Then select the Custom Field that you want to use. After that please enter a message to send to the user if the answer is not valid. Enable the Webhook URL and enter the URL from Integromat.
After clicking the "Click here to send dummy data" on SegMate, go back to Integromat.
There are 2 Input Types:
Free Type - Collecting the data that the users manually types into the messenger for you and you collect and attach that to a Custom Field which you can export to Custom Field Reports.
QR - The only data you can collect using the quick reply is e-mail and phone number.
Note: The User Input Element must always be the last element in a bot segment. You can also now delete the "No Thanks" button. You can always look at the Custom Field tutorial again for more information.
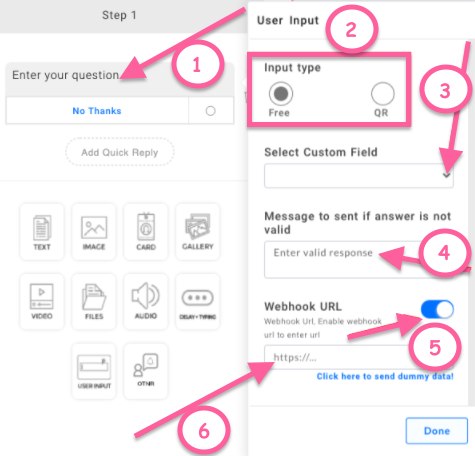
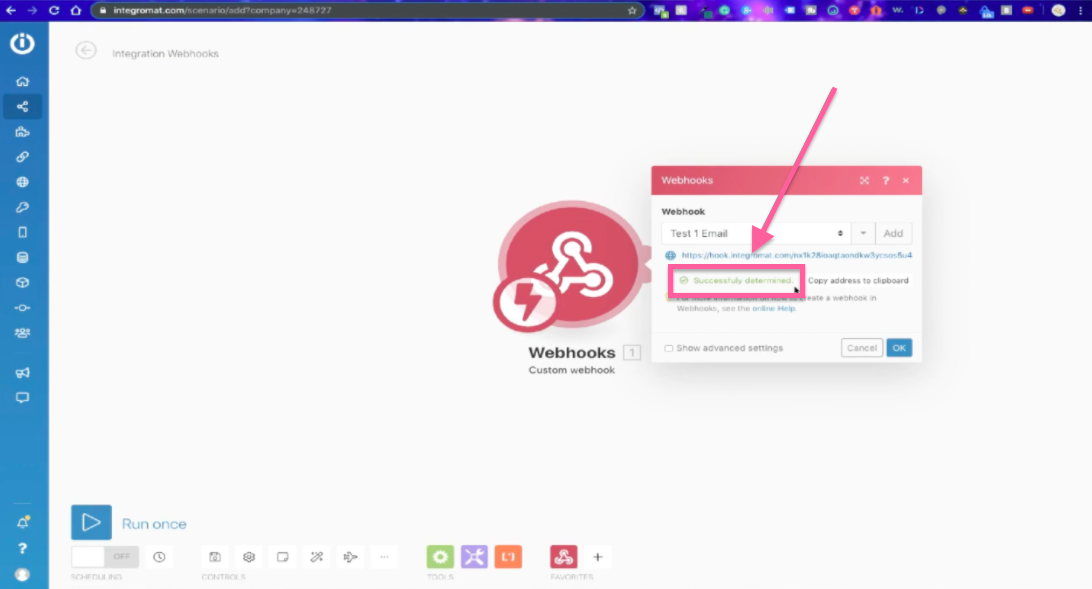
Step 8: Go back to Integromat. When it shows Successfully determined, you can now click Ok.
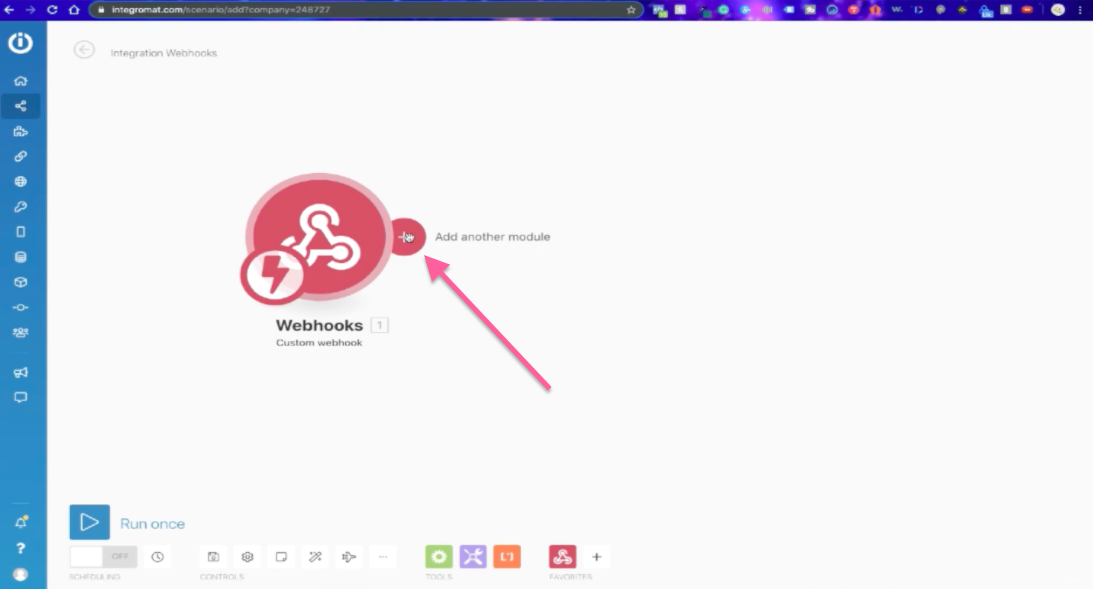
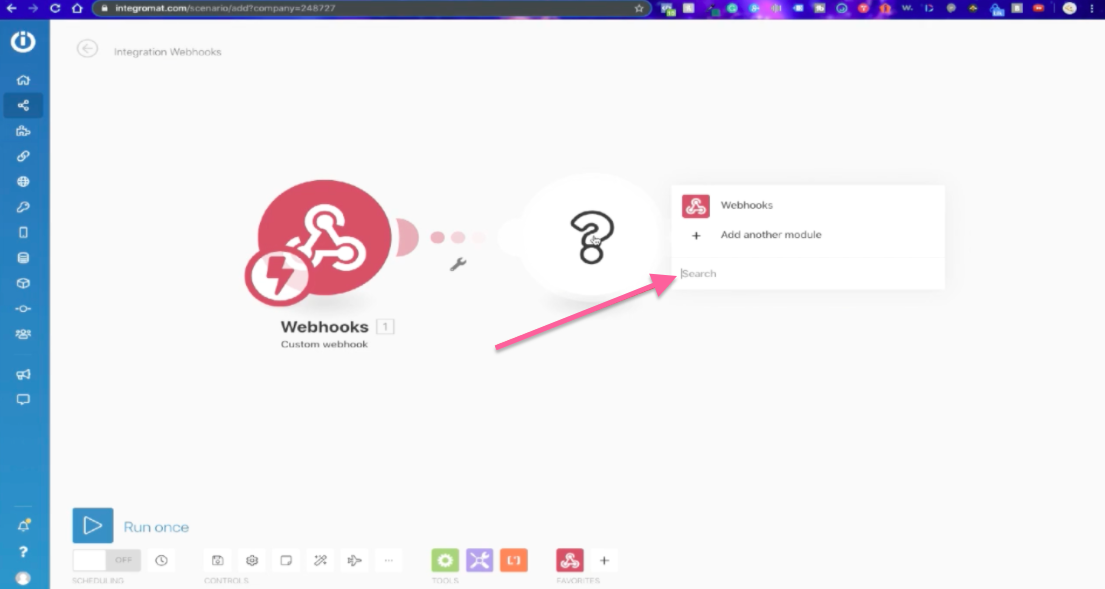
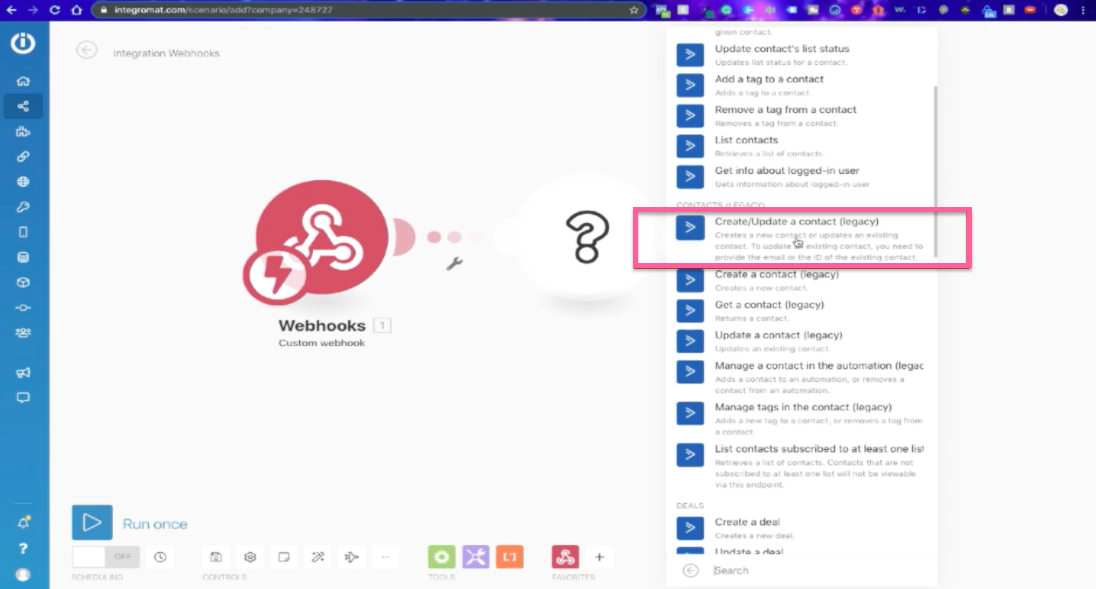
Step 9: Add another module and search for ActiveCampaign then click Create/Update a contact (legacy).
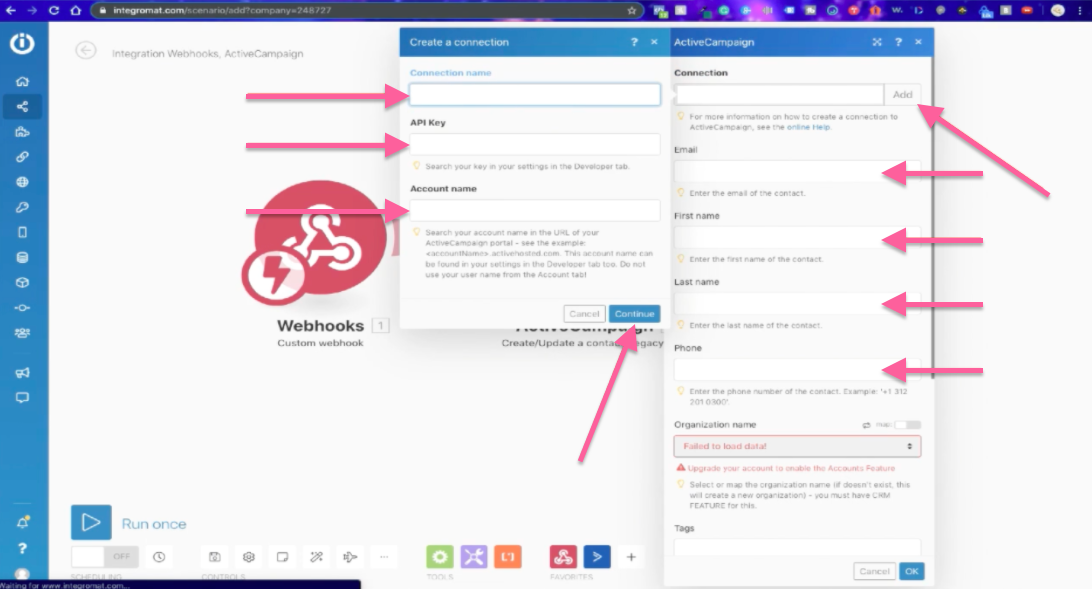
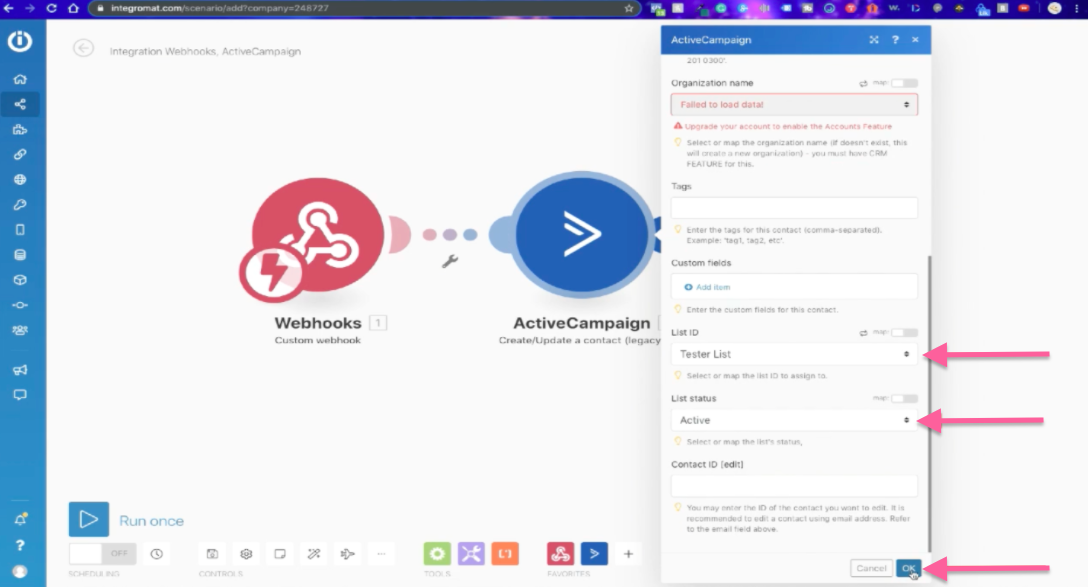
Step 10: Click Add and enter your Connection Name, API Key, and Account Name, then click continue. Please also fill up all the necessary information needed. (The one with the arrows only.)
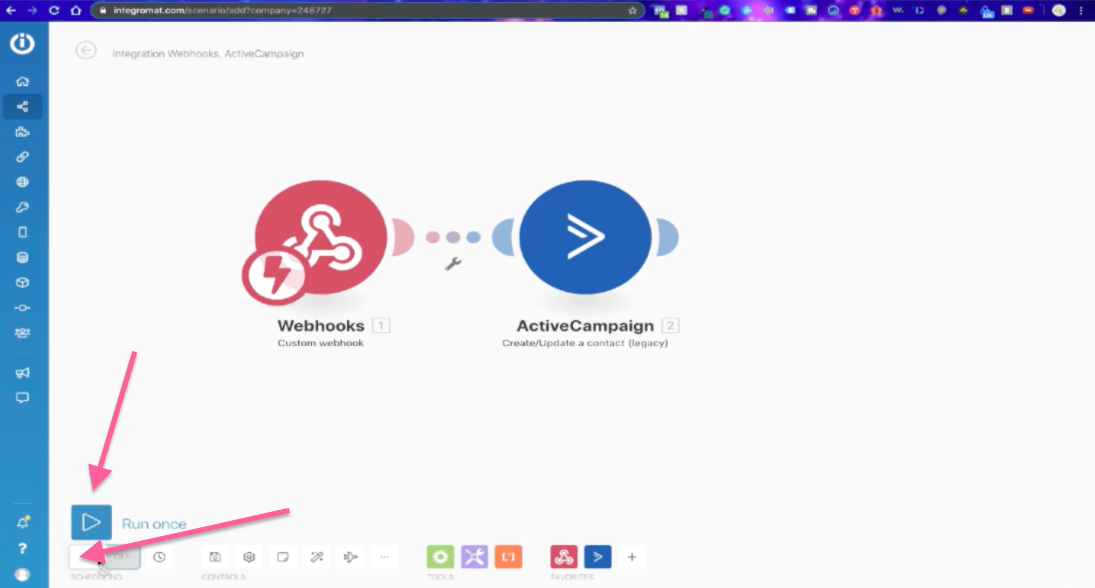
Step 10: Turn on the Toggle and click the Run Once.
Step 11: Go back to your bot and click Done.


