Introduction
Setting Up Custom Fields
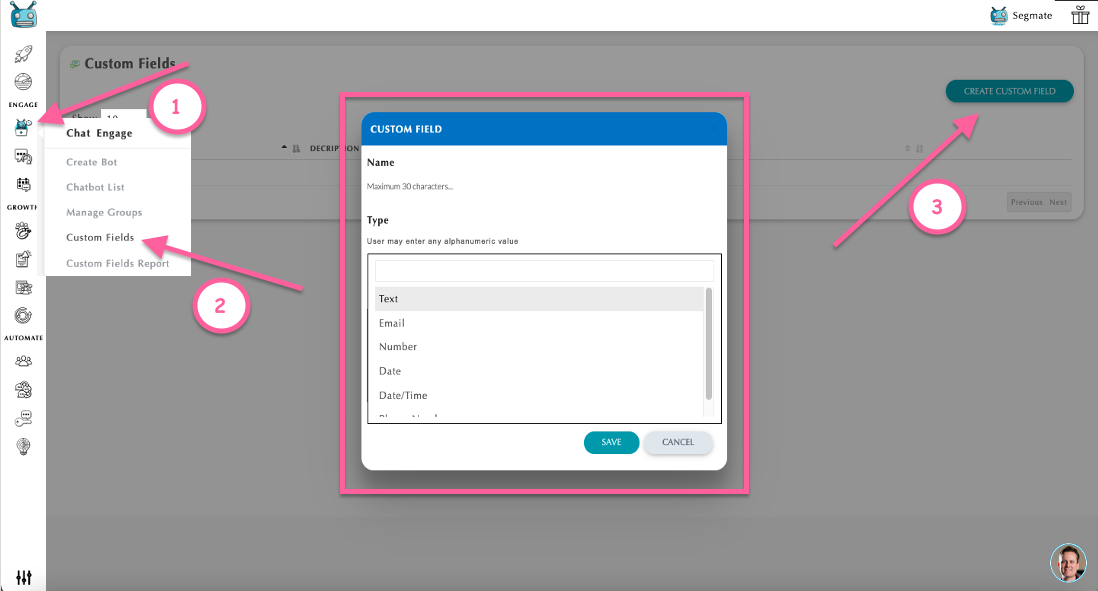
Step 1: Go to Chat Engage
Step 2: Click Custom Fields
Step 3: Create Custom Field. You will have 6 options:
- Text - User may enter any alphanumeric value.
- Email - User must enter a valid email address format.
- Number - User can only enter a number. "." is accepted in case of decimals.
- Date - Accepted Date formats: Y-m-d, Y/m/d, m-d-Y, m/d/Y
- Date/Time - Accepted Date formats: Y-m-d, Y/m/d, m-d-Y, m/d/Y
- Accepted Time formats: 24 hour (14:00) or 12 hour format (2:00pm EST)
For example: 12-30-2018 2pm EST
6. Phone Number - The following formats are accepted:
(555)555-5555
555 555 5555
555-555-5555
+55 555 5555
User Input Bot Element Settings
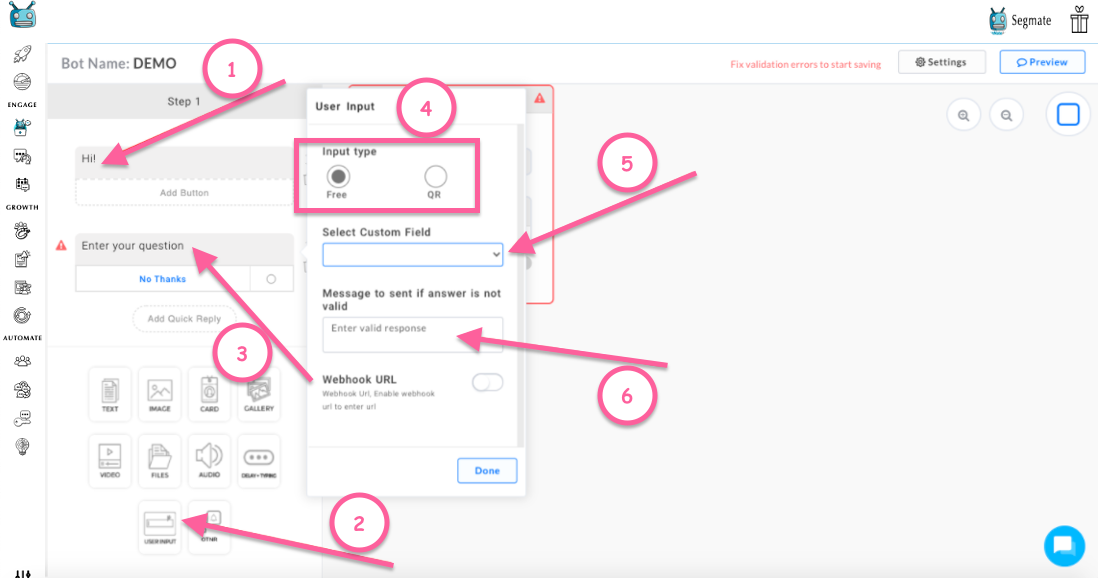
Step 1: Go to Chat Engage > Create a Bot > Enter a Bot Name > Select Group (optional) > Select Message Type then click Start.
Step 2: Enter your Message > Click the User Input Button > Enter your question > Select Input Type > Select your Custom Field and Enter a message that you want to send to the user if the answer is not valid, then click Done.
Note: If you see a red triangle beside your text area, please hover your mouse over it to see the error. Your bot will not be saved if you didn't fix it. The User Input Element must always be the last element in a bot segment. You can also now delete the "No Thanks" button.
Custom Field Reporting
Custom Field Report is where we hold all of the data that you have collected by setting up a Custom Field using the User Input Bot Element.
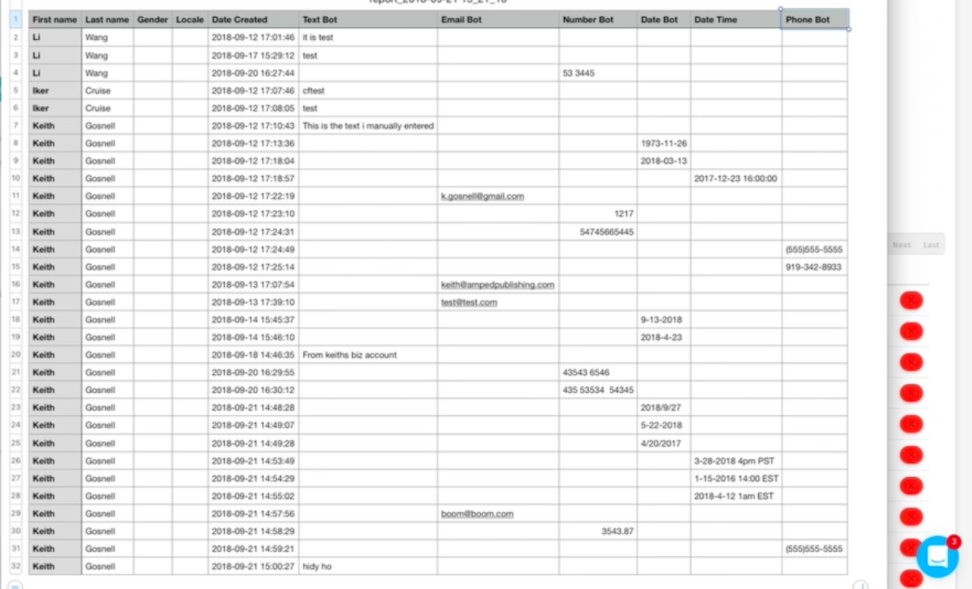
Note: You can export whatever data you would like into a CSV and take the data, manipulate it or import it to a third-party app or send it wherever you would like. Like email autoresponder, wherever it might be, whatever type of data you are collecting, you can export it to a CSV and upload.
Step 1: Go to Chat Engage
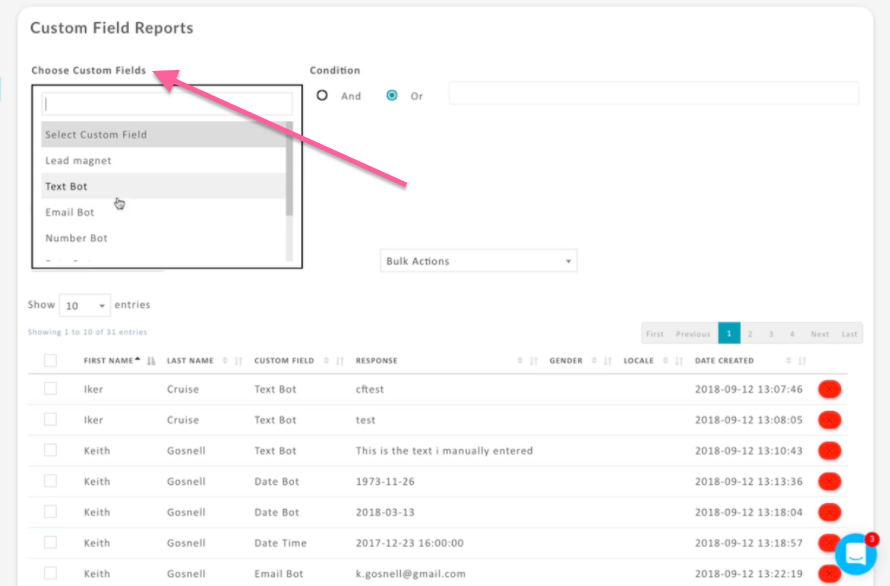
Step 2: Go to Custom Field Reports
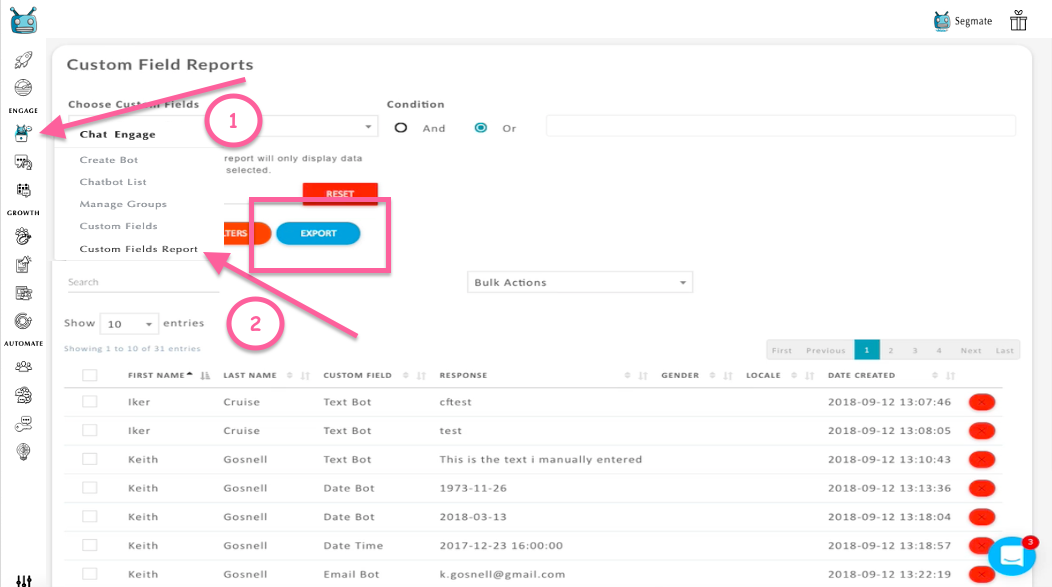
Step 3: You may choose how many reports you want to select or you can just click the Select All Reports then click Export.
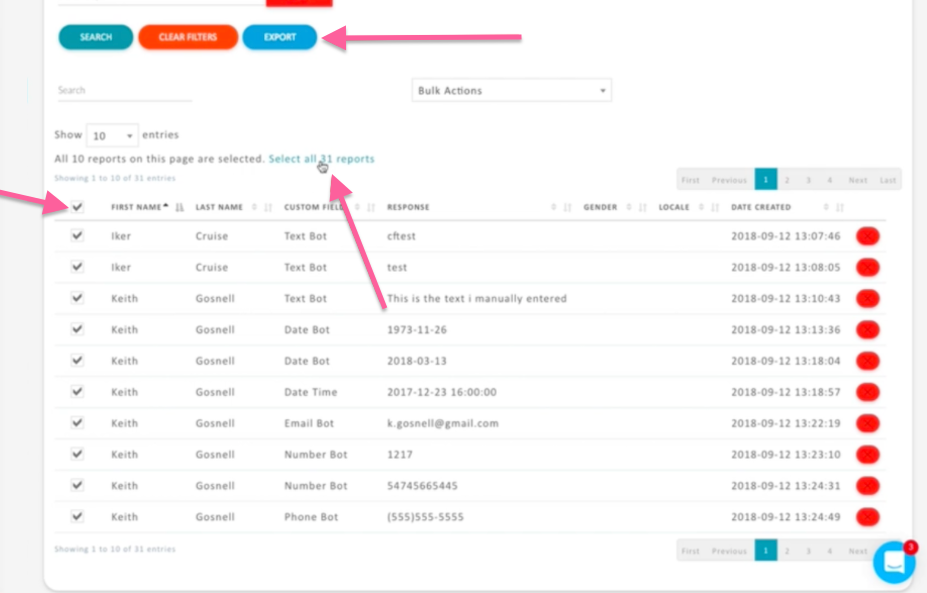
Note: You can also do some filtering by clicking the drop-down arrow under Choose Custom Field and click Search. You can also delete your filters by clicking the Clear Filters.
Email & Phone Number Quick Replies
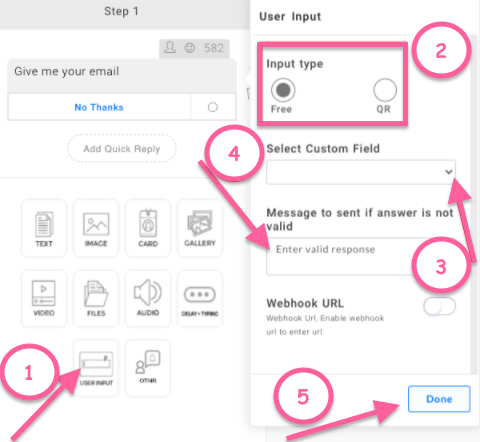
Step 1: Go to Chat Engage > Create a bot > Click the User Input Button. Enter your question on the text box and choose your User Input. Then select the Custom Field that you want to use. After that please enter a message to send to the user if the answer is not valid. Then click Done.
There are 2 Input Types:
Free Type - Collecting the data that the users manually types into the messenger for you and you collect and attach that to a Custom Field which you can export to Custom Field Reports.
QR - The only data you can collect using the quick reply is e-mail and phone number.
Note: The User Input Element must always be the last element in a bot segment. You can also now delete the "No Thanks" button and edit the message to send if the answer is not valid. You can always look at the Custom Field tutorial again for more information.