

We're excited to announce we have 35 integrations and 28 native integrations from third parties available to you. Many are available in the INTEGRATIONS tab with more coming out soon.
Some allow you to integrate into 1,000's of Apps!
Email Autoresponders
- sendlane
- ActiveCampaign
- InfusionSoft (It's there just no training out yet.)
- Campaign Refinery (It's there just no training out yet.)
- Mailchimp
- SendGrid
- ConvertKit
- GetResponse
- moosend
- AWeber
- Drip
- EmailOctopus
- iContact
- Kyvio
- Mailerlite
- Mailvio
- SendFox
- Platformly
- Ontraport
- Sendiio
Webinar Platforms
Membership Platforms
1. EverLesson
Contest Apps
1. PerkZilla
2. LetSpinio
Affiliate and Checkout Platforms
1. PayKickStart (Deep Integration)
Page Builders
Add 1000's of Other Apps
1. Zapier
2. Integromat
3. Intergrately
We will teach you in this video how to set up these new integrations. This is a general overview and we have videos for each integration. If you want to know how each of them works, you can go to the help section in the tutorials.
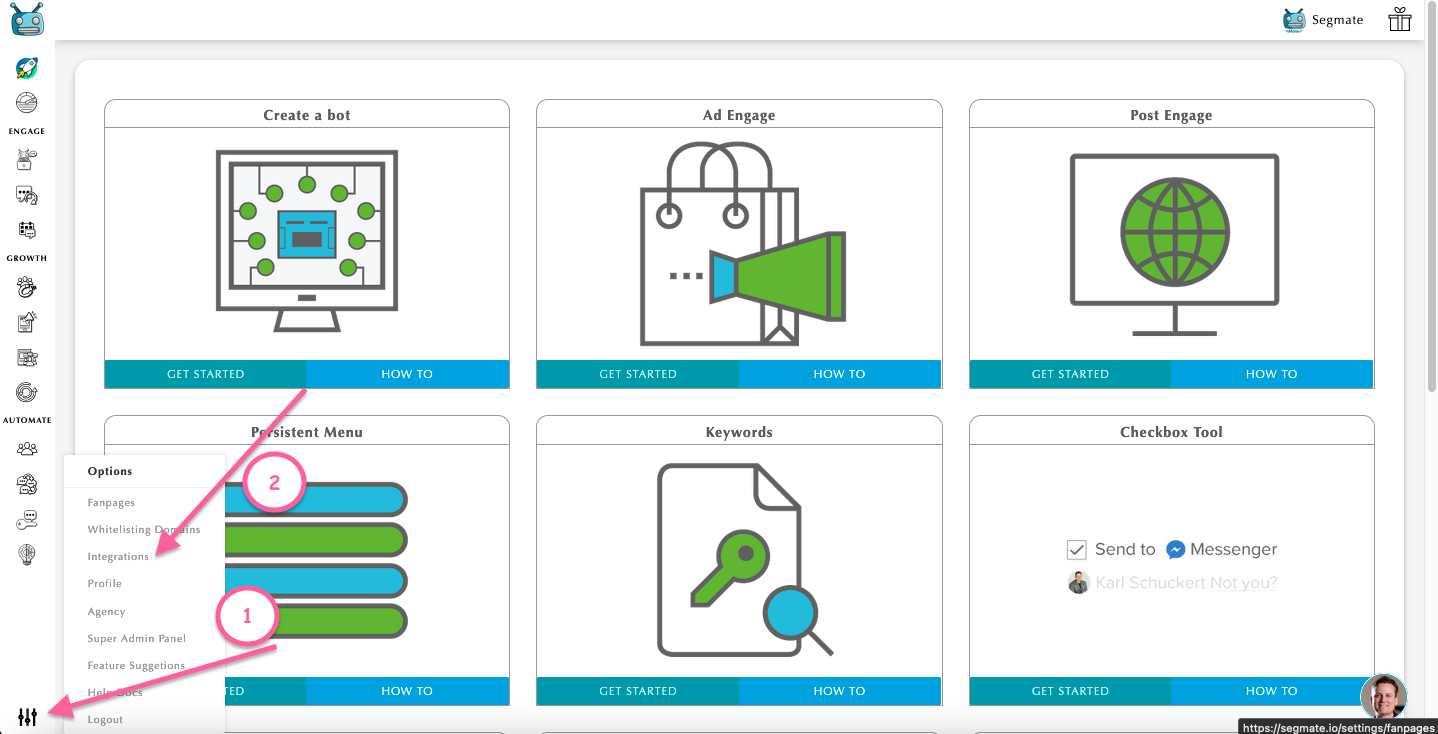
Step 1: Log in to your SegMate account. Hover your mouse cursor over Settings in the bottom left corner and select Integrations.
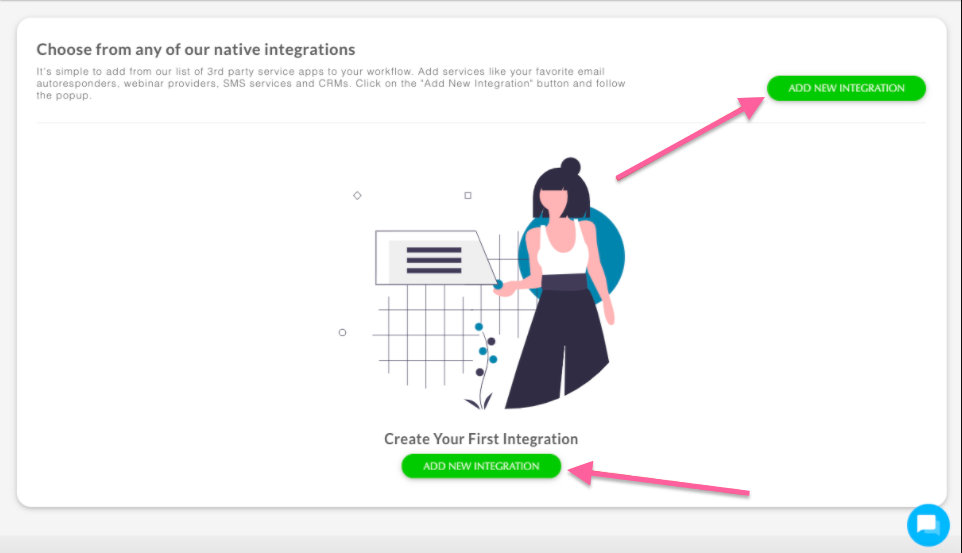
Step 2: Click Add New Integrations.
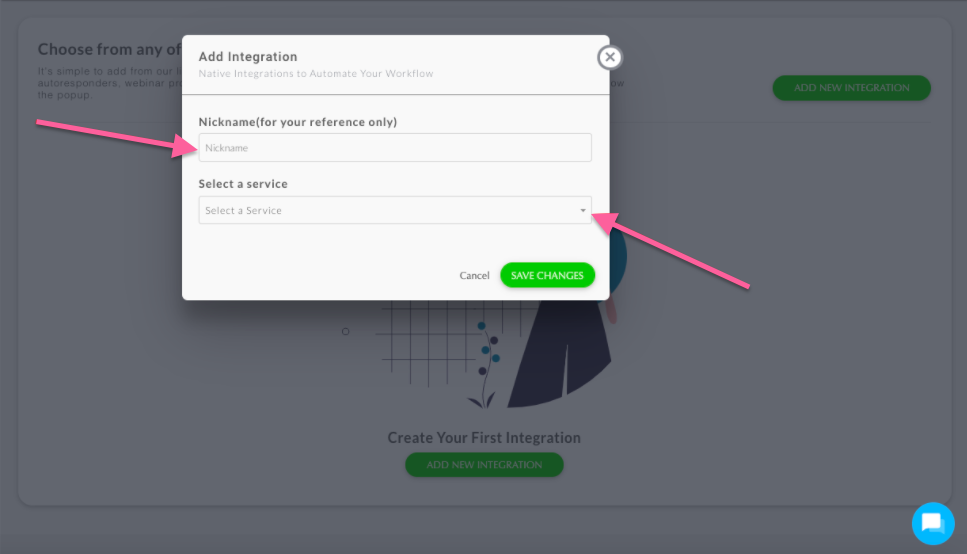
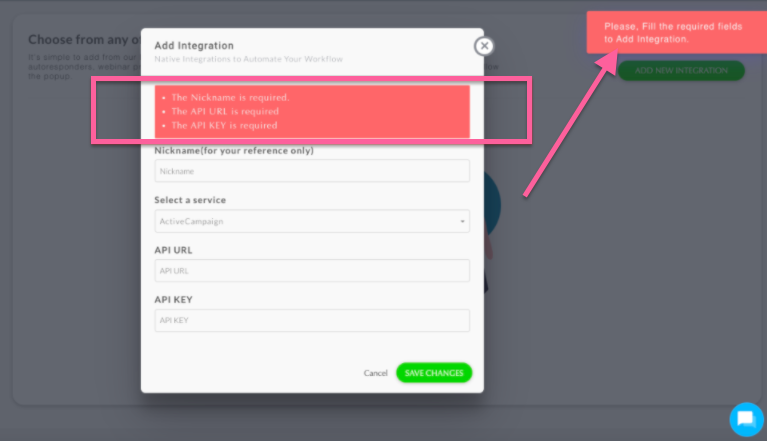
Step 3: Enter a nickname and Select A Service.
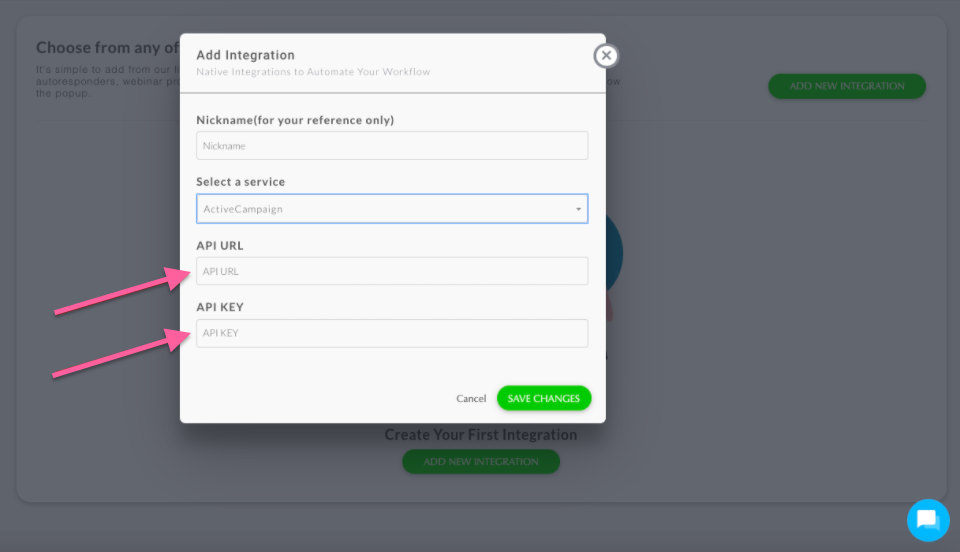
For example, you select Active Campaign, you will see that there's an API URL and API KEY, there is individual training for each of the integrations that will show you where to get it and then you add it and click save changes. And if you miss something, it will pop up and tell you need to fill out this area to continue.
Note: Before you proceed, please make sure that you already built your custom field. If you don't have your custom field, please make sure to do that before you do the Bot. If you already built your custom field, you can see it when you click the drop-down arrow under the Select Custom Field.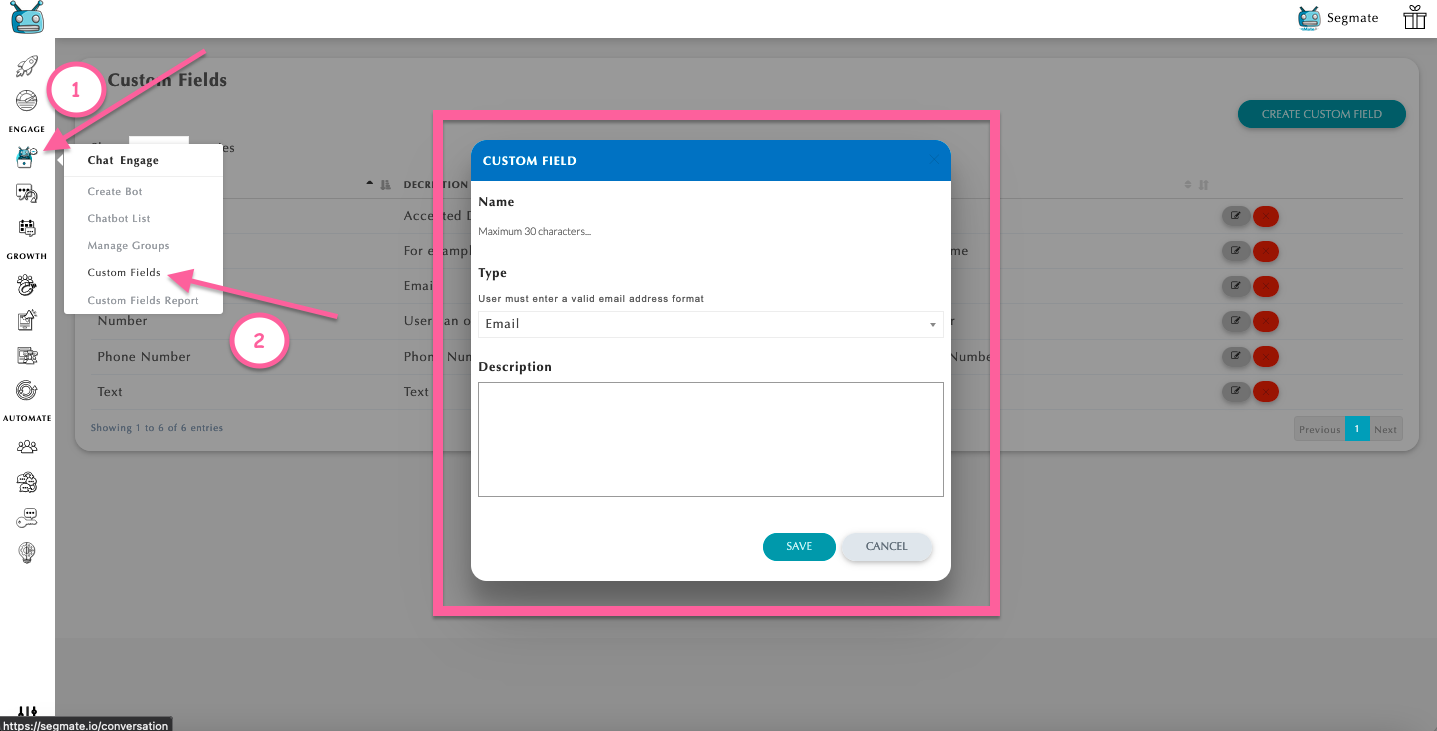
Step 4: Go to Chat Engage and Create Bot. Enter your question on the text box and choose your User Input Type. Select the Custom Field that you want to use. Then enable the toggle button on Integrations. You are allowed to utilize up to 2 Integrations at once and a Webhook. You can send that emails to 3 different places
There are 2 User Input Types:
Free Type - Collecting the data that the users manually type into the messenger for you and you collect and attach that to a Custom Field which you can export to Custom Field Reports.
QR - The only data you can collect using a quick reply is e-mail and phone number.
Note: The User Input Element must always be the last element in a bot segment. You can also now delete the "No Thanks" button. You can always look at the Custom Field tutorial again for more information.
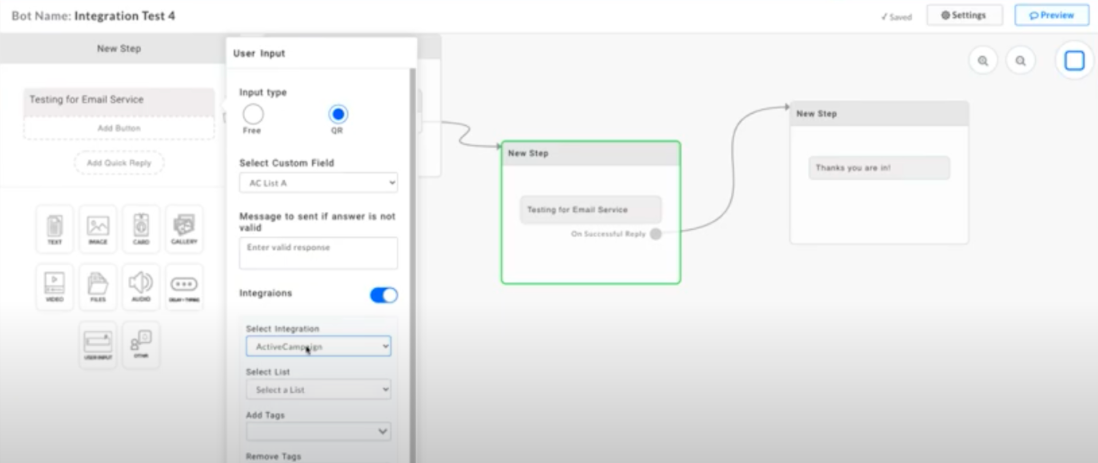
Step 5: Select Integration. Then select list. You can also add or remove a tag. You may also use webhook URL with Zapier, Integromat, Integrately along with the other services that we talked about in the integrations area. Please make sure to test or preview all of your integrations to make sure that it is working.
Note: You can find the integrations area in our knowledge-based here.